Google Cloud project management
This topic describes how to add Google Cloud projects to CloudFlow.
For details about required permissions, see Permissions required for Google Cloud
You can choose from the following four onboarding methods to add new Google Cloud Projects:
-
With script - Uses scripts to onboard Google Cloud resources. Changes to projects in Google Cloud after onboarding are automatically synced to CloudFlow.
-
No script - Onboard Google Cloud resources without using scripts. Changes to projects in Google Cloud after onboarding are automatically synced to CloudFlow.
-
API (single account) - Onboard a single project. Changes to the projects after onboarding are not synced.
-
Terraform - Leverage Terraform, the infrastructure-as-code solution, for onboarding your Google Cloud projects into CloudFlow. Changes to projects in Google Cloud after onboarding are automatically synced to CloudFlow.
Notes:
-
To add projects to CloudFlow, you need Google Cloud service account credentials.
-
Onboarding means giving access to CloudFlow to collect data from your Google Cloud projects. To stop data collection (delete your project), you must withdraw access to CloudFlow by revoking the CloudFlow permissions within your cloud vendor environment.
-
Project IDs must be unique across all organizations for the onboarding process to complete successfully.
-
Any changes to projects in an onboarded Google Cloud folder or organization will automatically sync with CloudFlow once every hour.
Access the Onboarding wizard
Do the following:
-
In the CloudFlow
 Settings area, click
  ONBOARDING.
On the Onboarding Managment page that opens, click +Onboard.
-
If you are onboarding your first account, click the New Cloud Account button on the welcome page.
-
Otherwise, click the
 Google Cloud button and click Next.
The Google Cloud Onboarding wizard appears.
-
Select your preferred method to onboard using the Select Onboarding Method dropdown.
*Automatically syncs changes to projects from Google Cloud to CloudFlow after onboarding. Onboarding Method Description Automatic sync* With script Uses scripts to onboard Google Cloud resources Yes No script Onboard Google Cloud resources without using scripts Yes API (single account) Onboard a single Google Cloud via API No Terraform Onboard Google Cloud resources using Terraform Yes -
Onboard Google Cloud resources using your preferred method:
 To onboard Google Cloud resources | With script
Do the following:
-
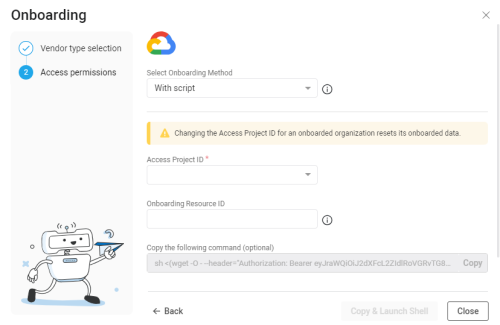
In the Onboarding wizard for Google Cloud, from the Select Onboarding Method dropdown, select With script to select the onboarding method using scripts.
-
The Google Cloud Projects Onboarding wizard is displayed.
-
In the Access Project ID field, input an Access Project ID using one of the following methods:
-
From the dropdown: Select an existing Google Cloud Project ID to grant access to the Google Cloud resource. CloudFlow will have access to the previous resources and the new resource.
-
Enter a new Access Project ID into the field: The project is used to establish access to the Google Cloud resources.
Warning: Changing the Access Project ID for an already onboarded organization resets its onboarded data.
-
-
(Optional) In the Onboarding resource ID field, enter the ID of the project, folder, or organization root to onboard.
Note: When this field is left blank, CloudFlow will onboard the project you entered in the Access project ID field.
-
Complete the onboarding using one of the following methods:
-
To open a Cloud Shell session directly from the CloudFlow interface:
-
Click Copy & Launch Shell.
The Cloud Shell command is automatically copied into the system memory and the browser opens a new tab with the Google Cloud Shell displayed.
Important: Before clicking Copy & Launch Shell, make sure no Google Cloud Shell terminals are already open to avoid "Billing not found" errors.
-
Paste the Cloud Shell command from system memory (Ctrl-Shift-V) and press Enter.
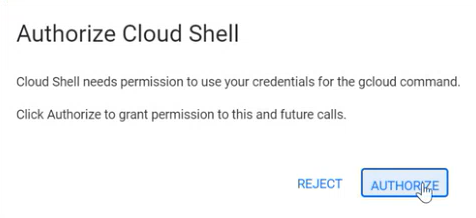
The Authorize Cloud Shell confirmation window appears.

-
Click AUTHORIZE.
An onboarding script runs in the Cloud Shell. This script creates an access project and automates all the steps necessary to onboard the resource(s) to CloudFlow.
-
When the script finishes, press Ctrl-D to close the terminal.
The CloudFlow Onboarding Management page displays the newly onboarded resources.
Note: It may take up to an hour for Google Cloud to sync with CloudFlow.
-
-
(Alternative method) If you don't want to open a Cloud Shell session directly from the CloudFlow interface, you can run bash locally using a proxy:
-
Click Copy to copy the Cloud Shell command.

Note: The command generates an unreadable script. Expand the example below to see the readable version of the script:
Example of CloudFlare script
Copy#!/bin/bash
#Algosec's onboarding URL
CF_ONBOARDING_URL='https://cloudflow.algosec.com/cloudflow/api/admin/v1/onboarding/gcp'
#Token
TOKEN='Bearer XXXX'
ENV='prod'
#Define a working project where a service account would be created
PROJECT_ID='gcp-pm-cf-demo-01'
PROJECT_ID=($(echo $PROJECT_ID | tr -d '\n'))
#Define a target project/folder/organization would be onboarded into CloudFlow
TARGET_RESOURCE='0123456789012'
TARGET_RESOURCE=($(echo $TARGET_RESOURCE | tr -d '\n'))
SERVICE_ACCOUNT_NAME_PREFIX="cloudflow-sa"
SERVICE_ACCOUNT_NAME="$SERVICE_ACCOUNT_NAME_PREFIX-$ENV" -
Paste and run the script in your alternative shell to complete onboarding the subscription(s).
The CloudFlow Onboarding Management page displays the newly onboarded resources.
Note: It may take up to an hour for Google Cloud to sync with CloudFlow.
-
-
To Onboard Google Cloud resources | No script
Requires CloudFlow read-only access
You can onboard Google Cloud Projects without using a script if your system does not support using scripts.
Do the following:
-
Log in to the https://console.cloud.google.com/ as a user with the following permissions:
- Organization Role Administrator or IAM Role Administrator
-
Organization Policy Administrator
-
Enable the required APIs for your project:
-
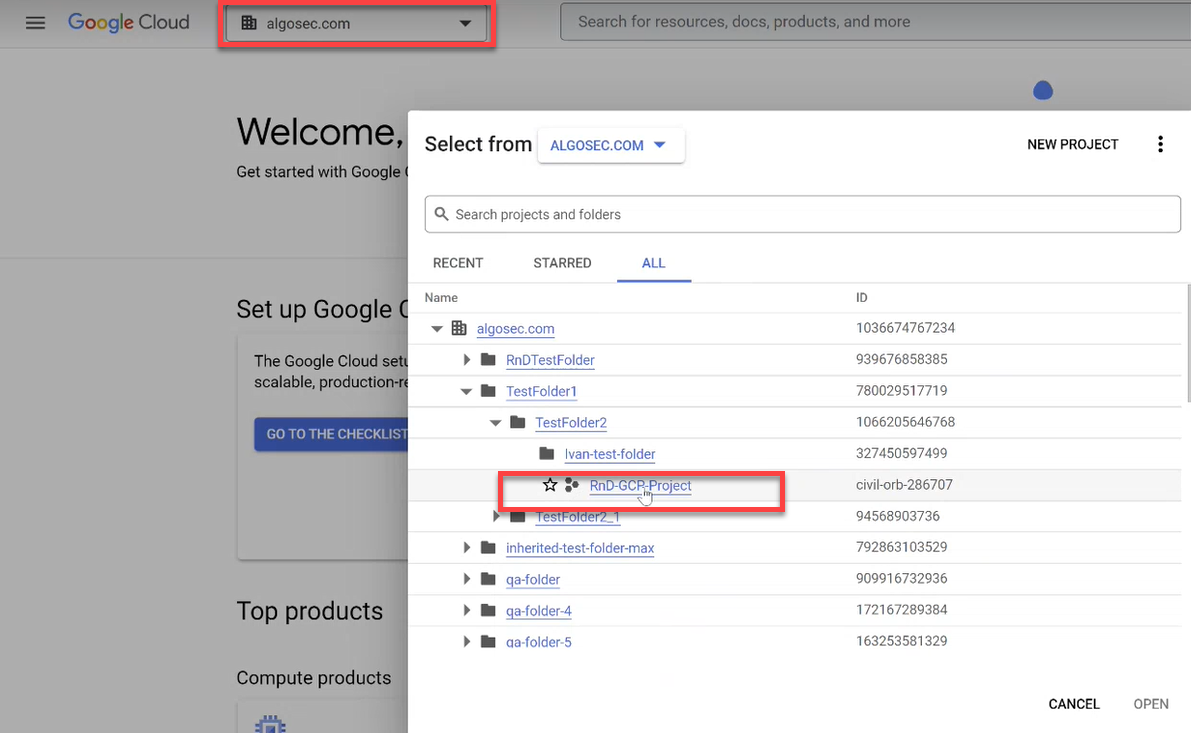
Click the project dropdown from the menu and choose your current project in the popup window that opens.
In this example, the project is called RnD-GCP-Project.

-
Click APIs & Services in the navigation menu.
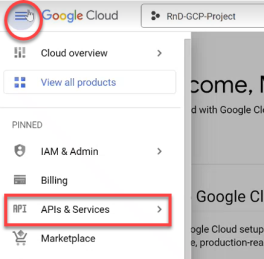
The APIs & Services page opens.
-
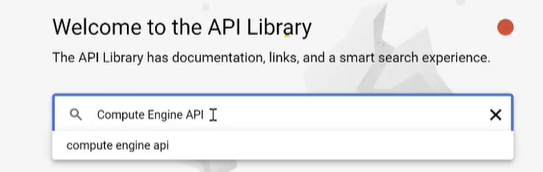
Click +ENABLE APIS & SERVICES at the top of the screen.

The Welcome to the API Library screen opens.
-
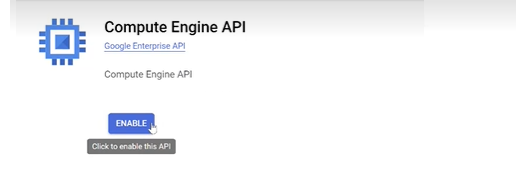
Search for Compute Engine API and make sure it is enabled.


-
Repeat the previous step for
-
Identity and Access Management (IAM) API
-
Cloud Storage API
-
Cloud Resource Manager API
-
Cloud Logging API
Note: For a details about required permissions see Permissions required for Google Cloud
-
-
-
Add a Service Account:
-
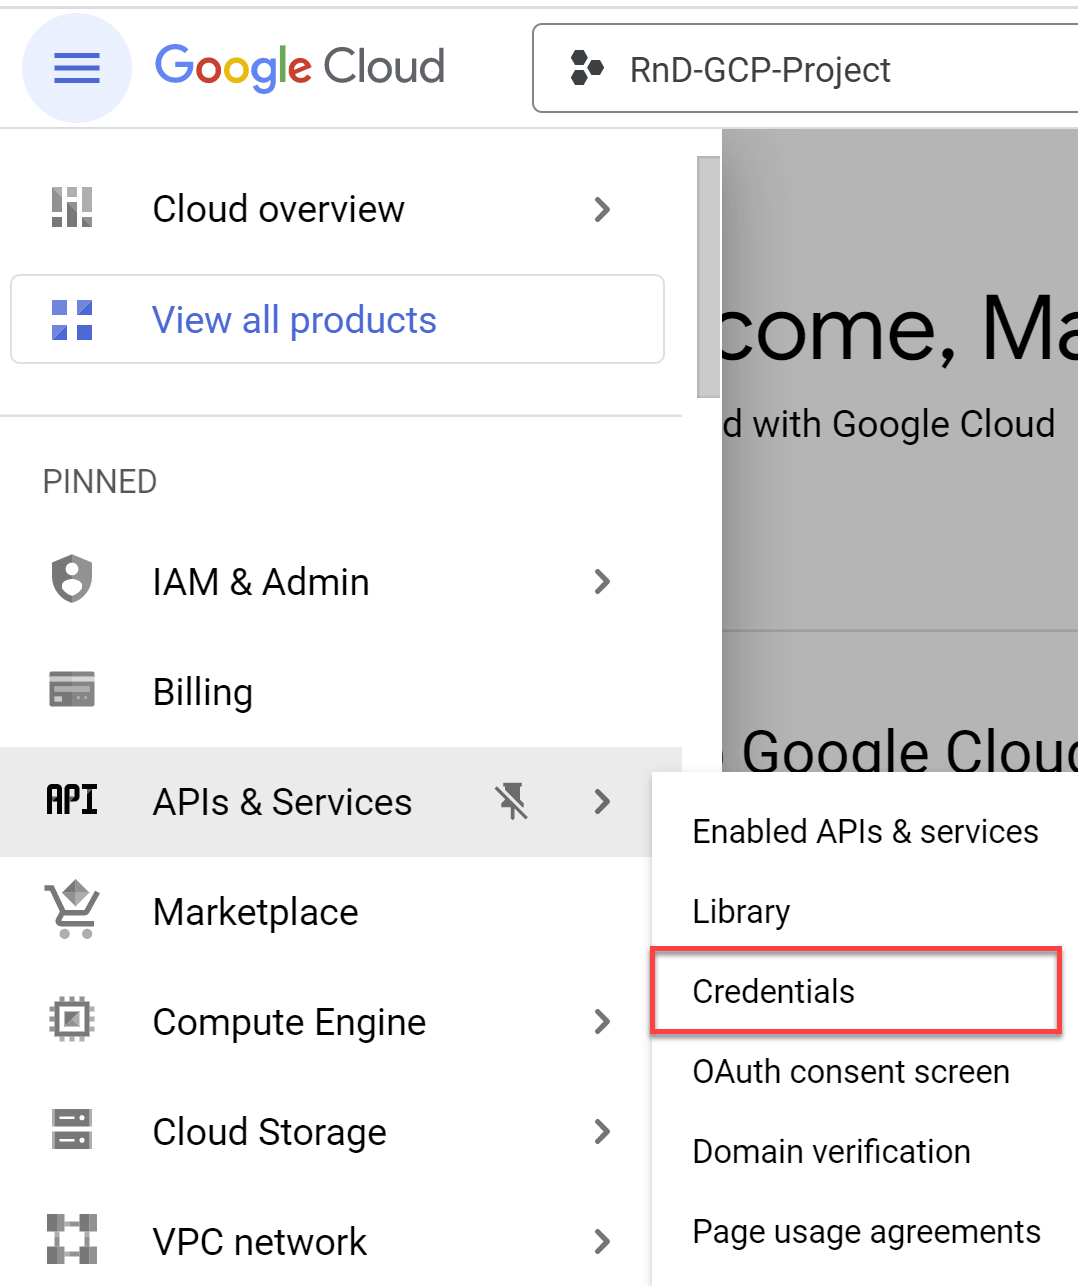
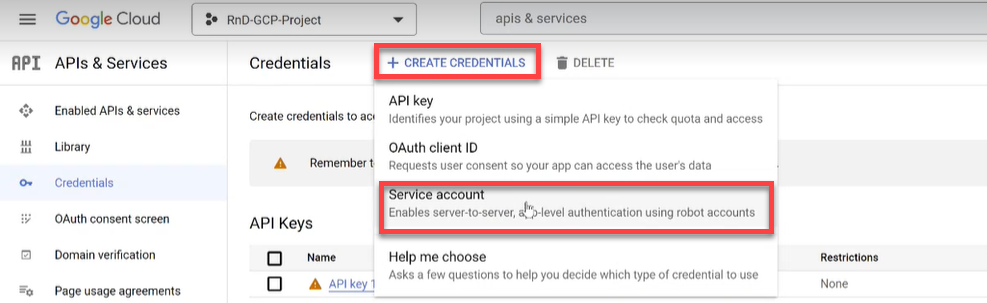
Select APIs & Services > Credentials in the navigation menu.

The Credentials screen opens.
-
Click on +CREATE CREDENTIALS and select Service account from the dropdown list.

-
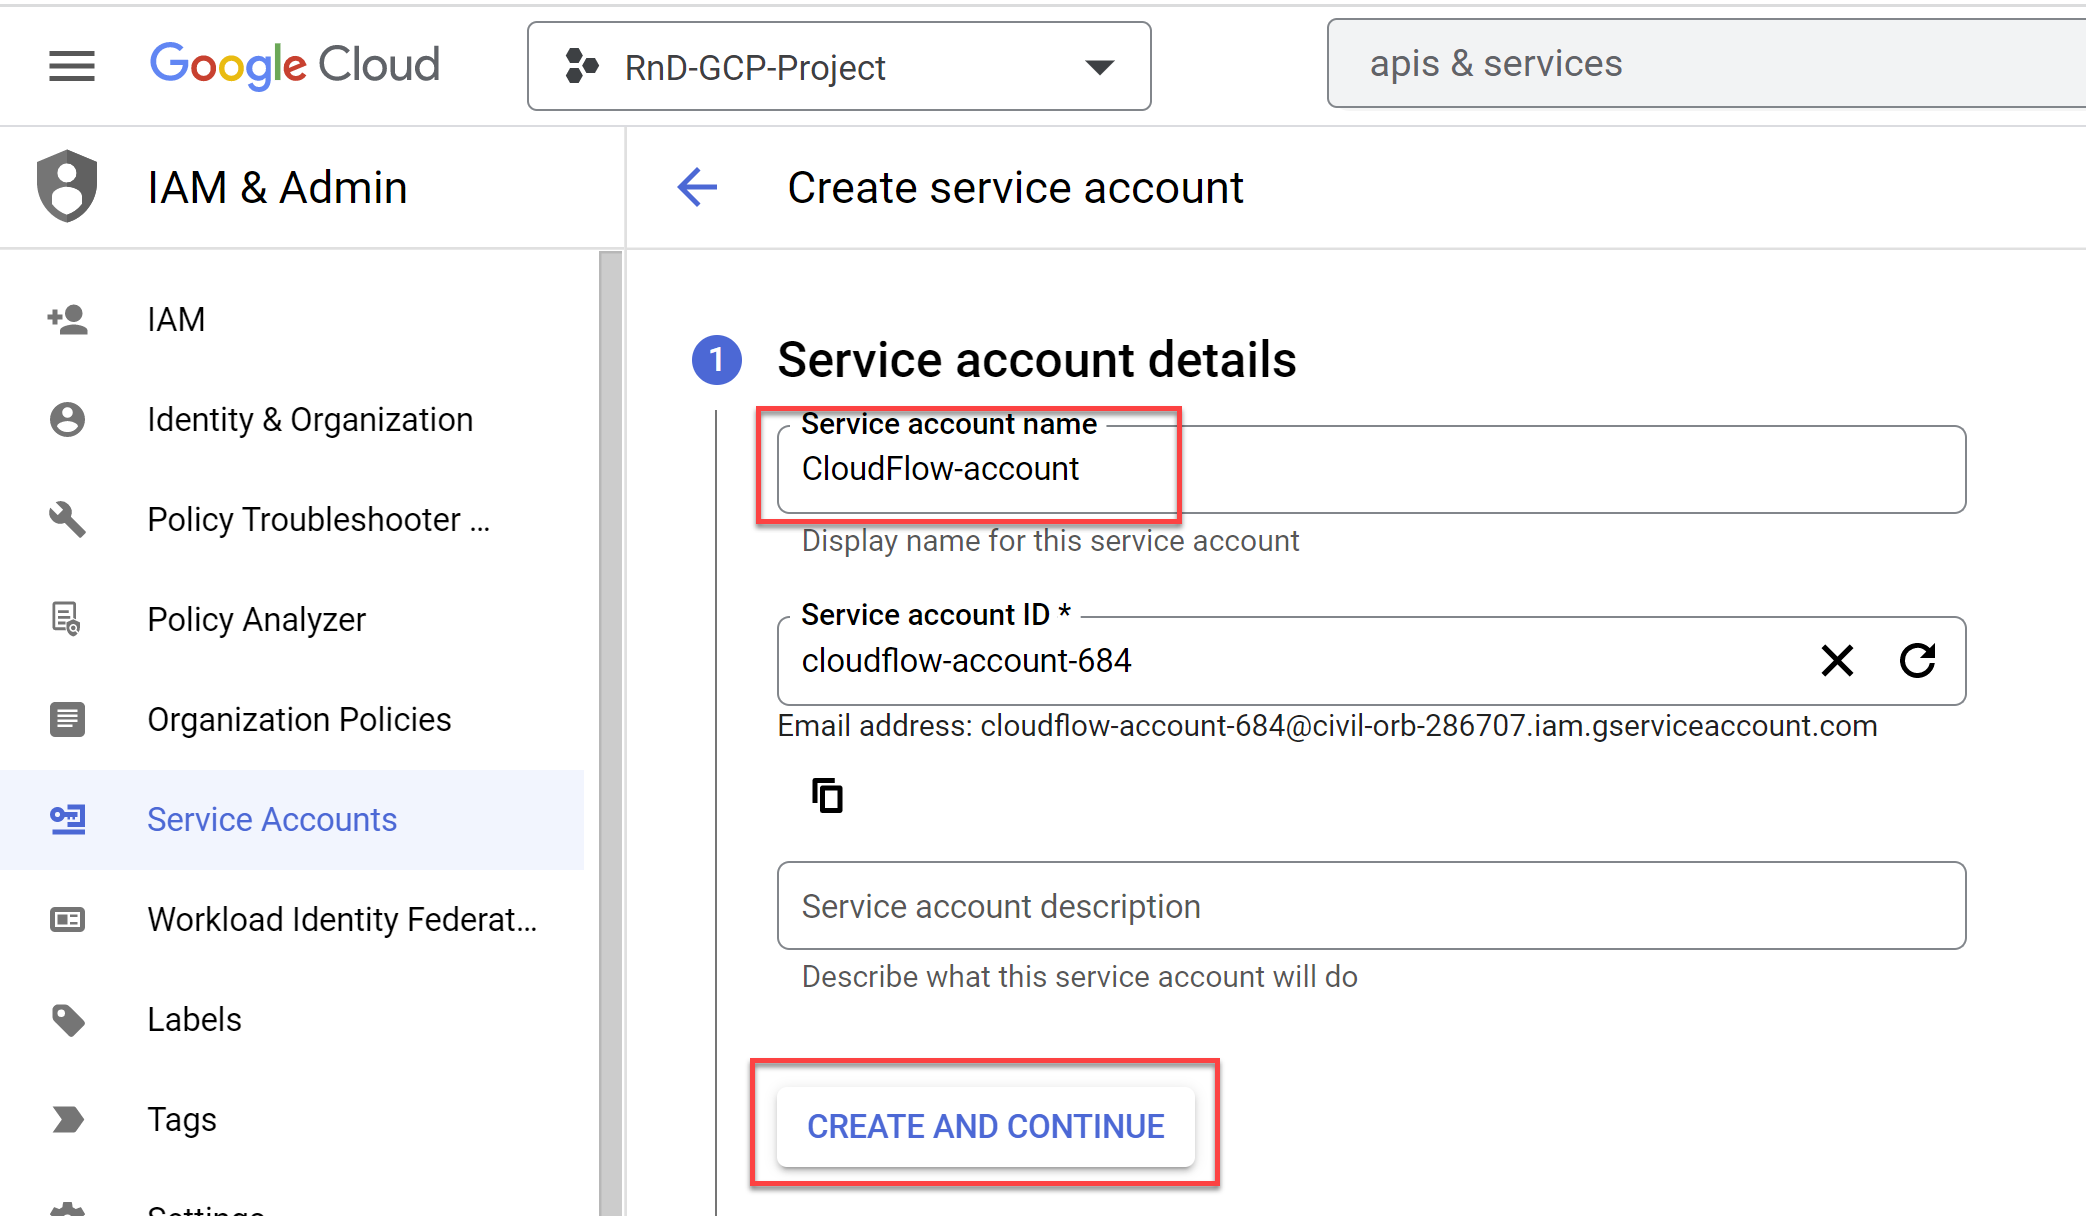
In the Service account name field enter "CloudFlow-account" and click CREATE AND CONTINUE.

-
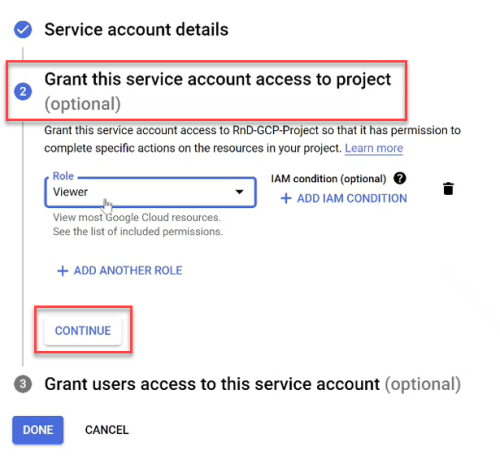
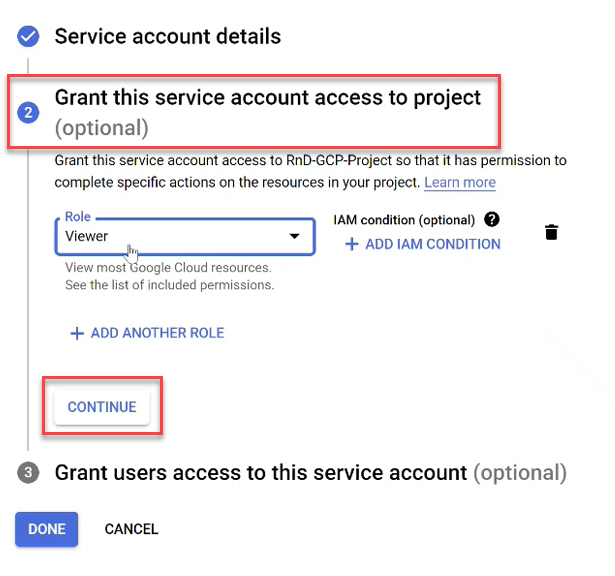
Click the Select a role dropdown and scroll to Project with the role Viewer.

Note: For the list of the Viewer role permissions see the Roles ID column in Permissions required for Google Cloud .
-
Click CONTINUE to save your changes. (Do not click DONE until you see a checkmark next to Grant this service account access to project).
-
Click DONE.
-
Copy the created Service Account email to use it later in Step 6b.

-
-
Export the Service Account credentials as a JSON file:
-
On the Credentials page, click on the Service Account email link for the CloudFlow account.

The CloudFlow account page opens.
-
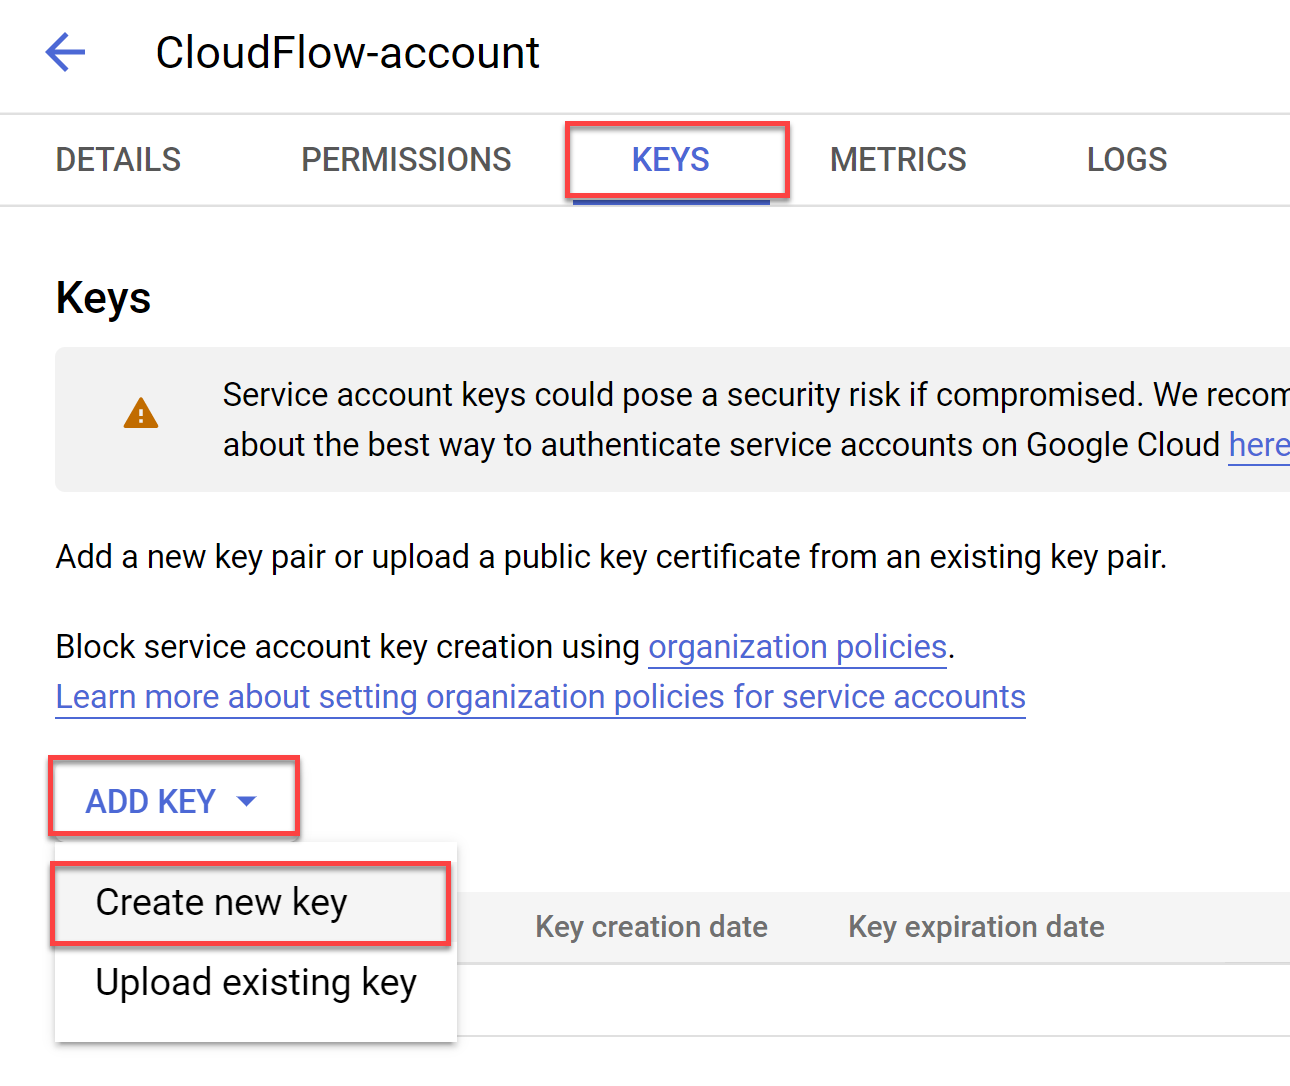
Select the KEYS tab. Click ADD KEY, and choose Create new key.

The Create Private Key for CloudFlow-account dialog appears.
-
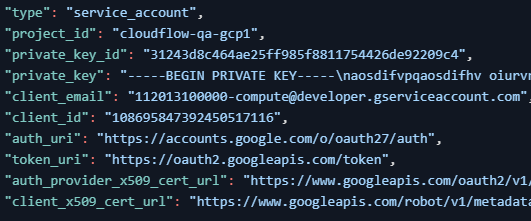
Select JSON for Key type and then click CREATE.
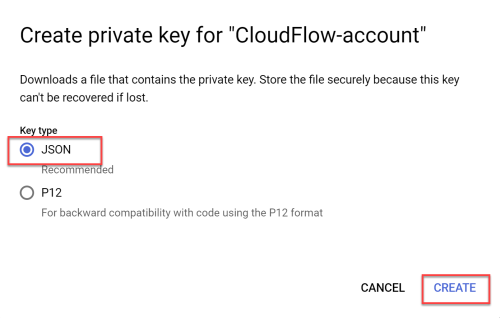
The JSON file is downloaded to your computer. You will use this file in Step 8.
This is an example of the Service Account credentials in a JSON file:
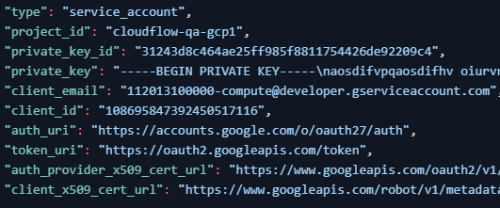
Note: Your browser may block downloading the file. See the URL box for notifications.
-
-
Create custom role with required permissions for your organization
-
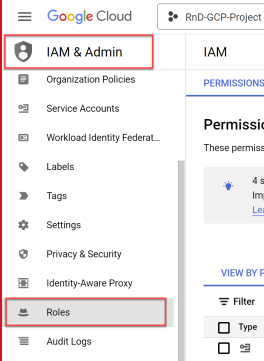
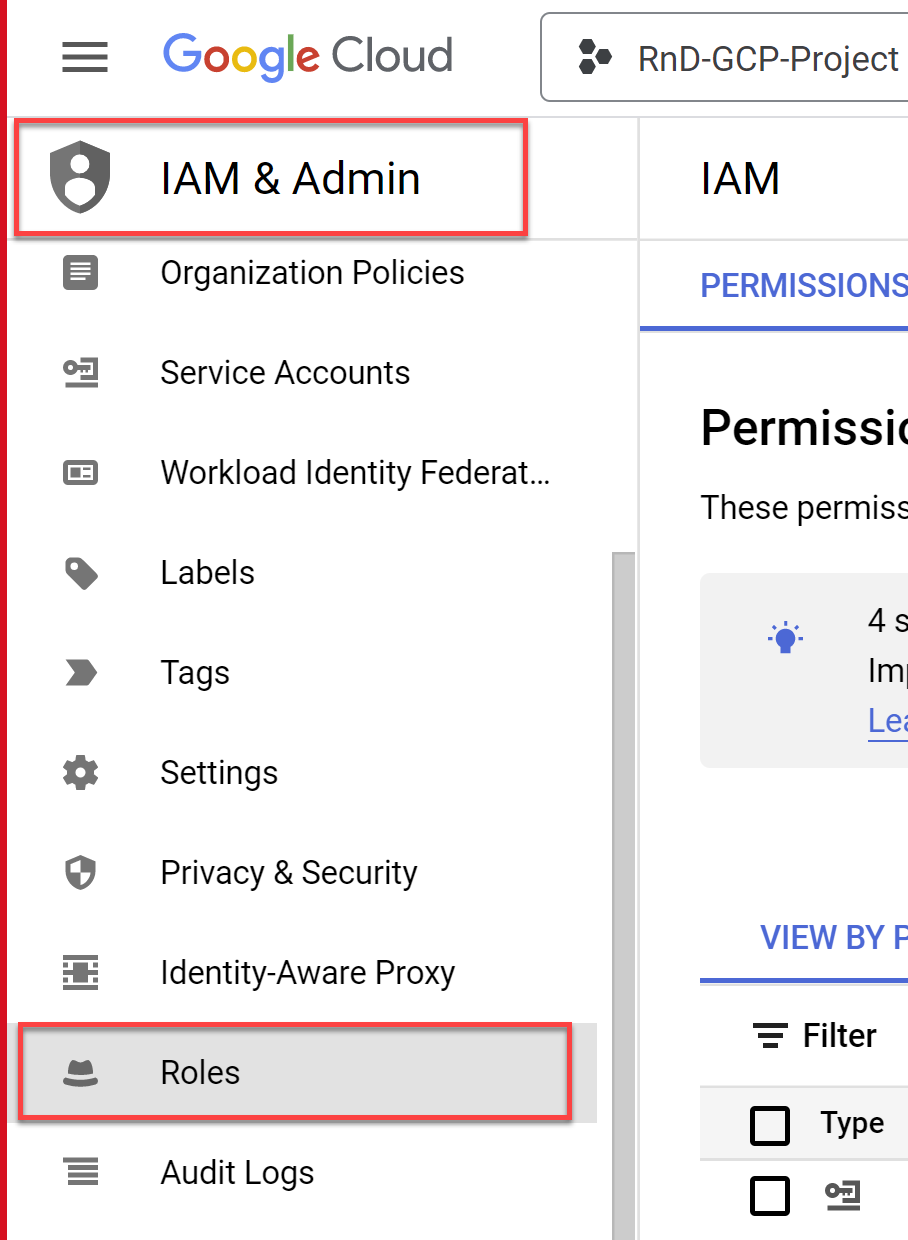
Select Roles located under IAM & Admin in the navigation menu.
-
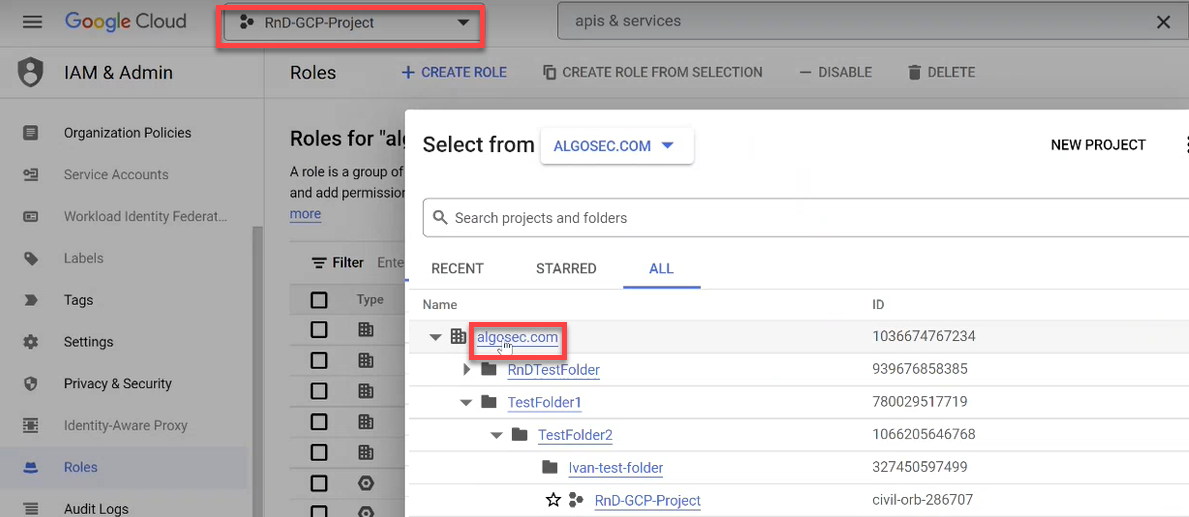
Click the project dropdown from the menu and choose your organization in the popup window that opens.

-
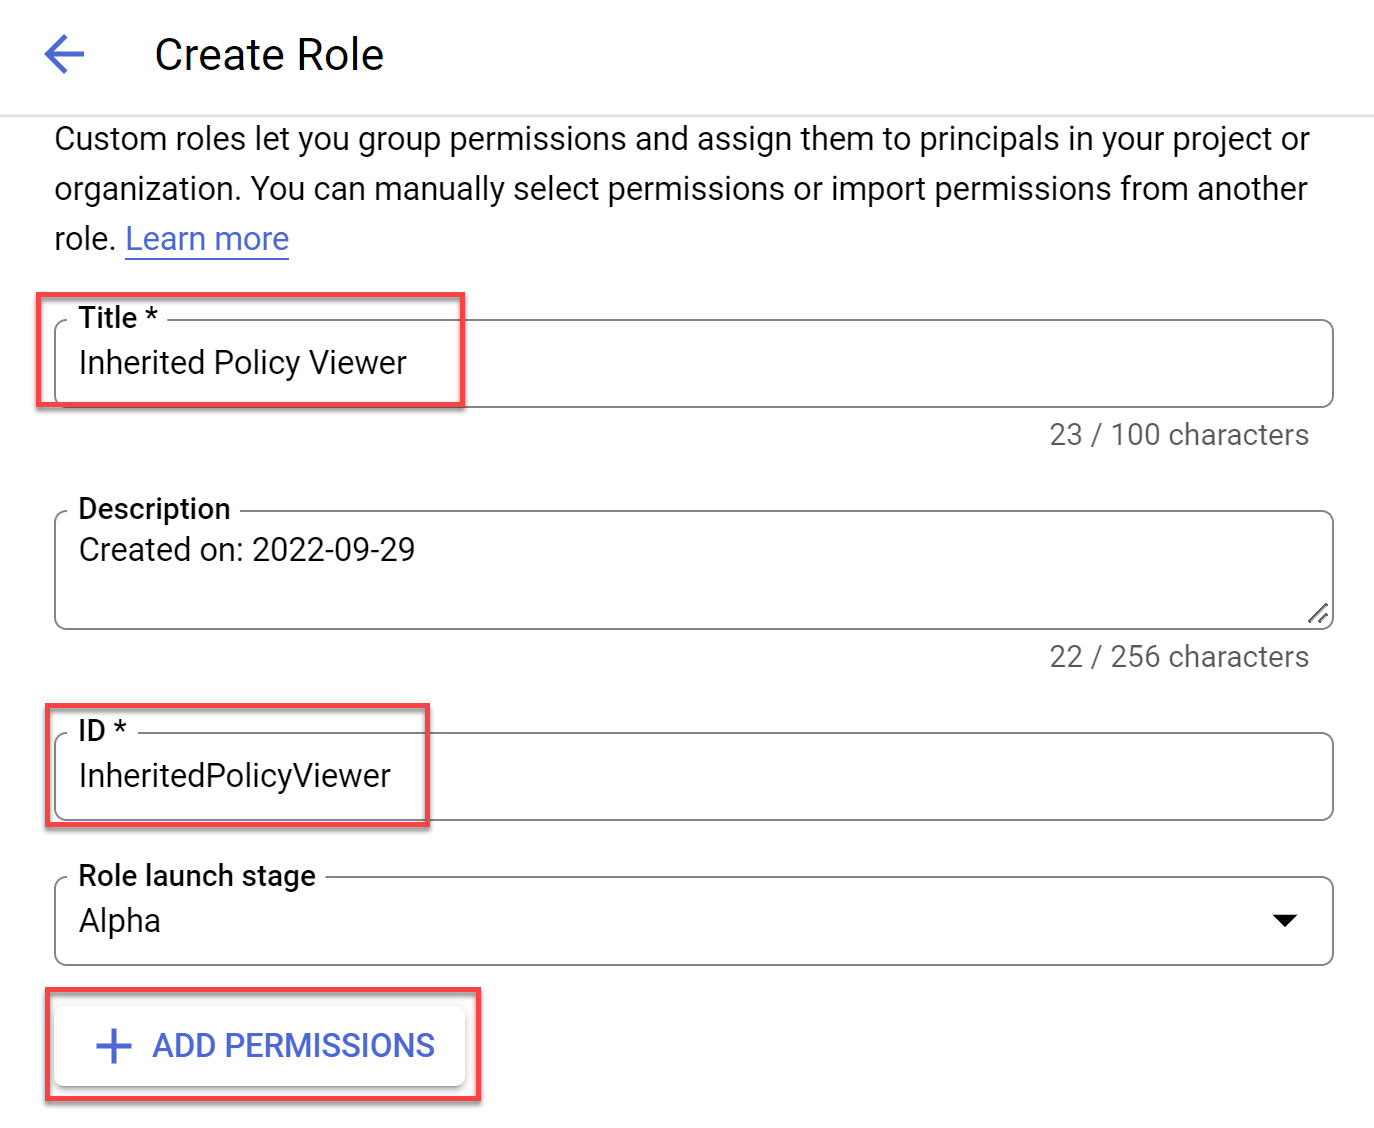
Click +CREATE ROLE. The Create Role screen opens.
-
Enter the role Title and ID and then click +ADD PERMISSIONS.
In the example below, Title is "Inherited Policy Viewer" and ID is "InheritedPolicyViewer".

The Add permissions window opens.
-
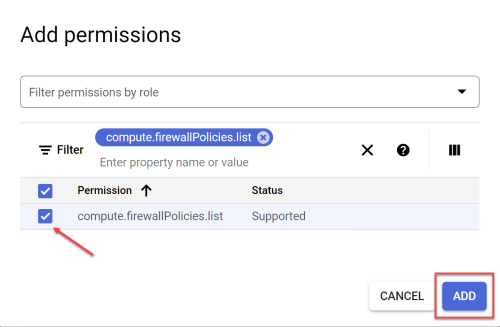
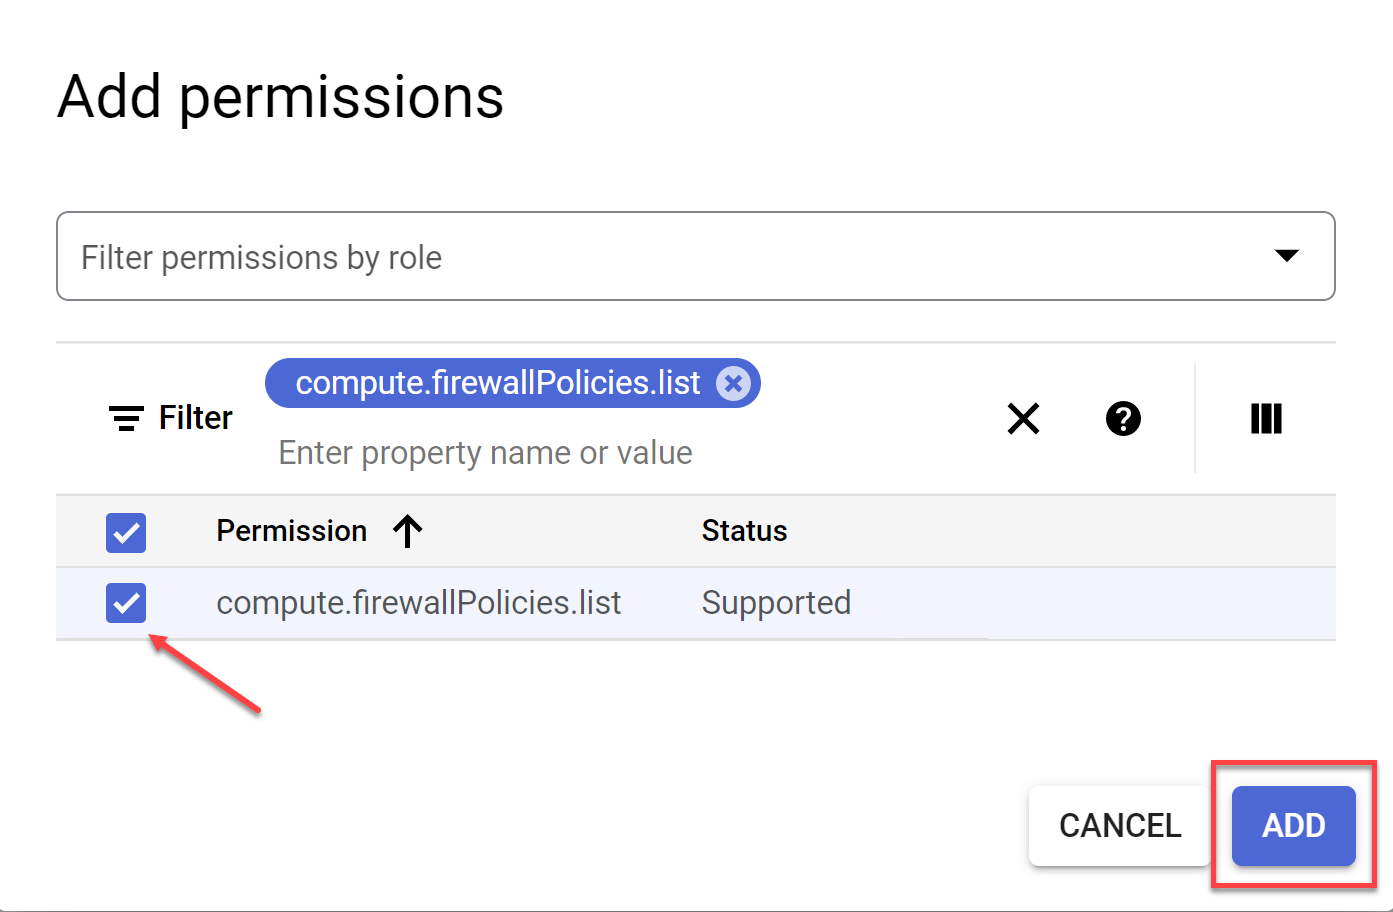
In the Enter property name or value field enter compute.firewallPolicies.list.

-
Choose the matching string from the list, click the checkbox to activate it and press ADD.
-
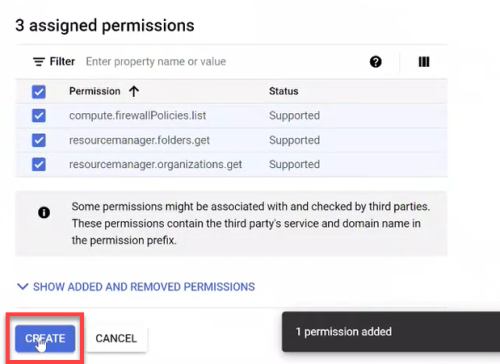
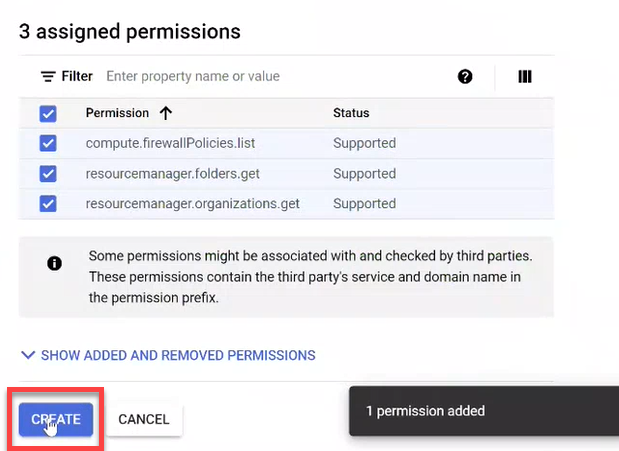
Repeat steps d through f for
-
resourcemanager.folders.get
-
resourcemanager.organizations.get
-
storage.buckets.list
Note: For a details about required permissions see Permissions required for Google Cloud
-
-
Click CREATE to complete the role creation process.
-
-
Assign the required role to the Service Account:
-
Select IAM located under IAM & Admin in the navigation menu and then click GRANT ACCESS or ADD.
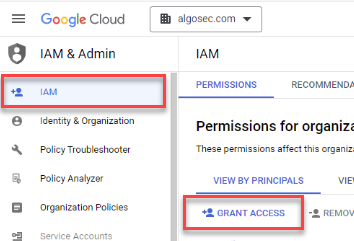
The Add principals screen opens.
-
Paste the Service Account email you copied from Step 3g into the New principals field and then choose it from the dropdown.
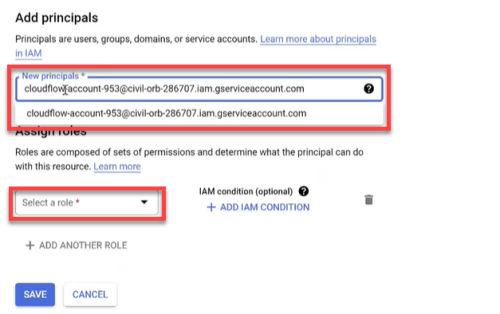
-
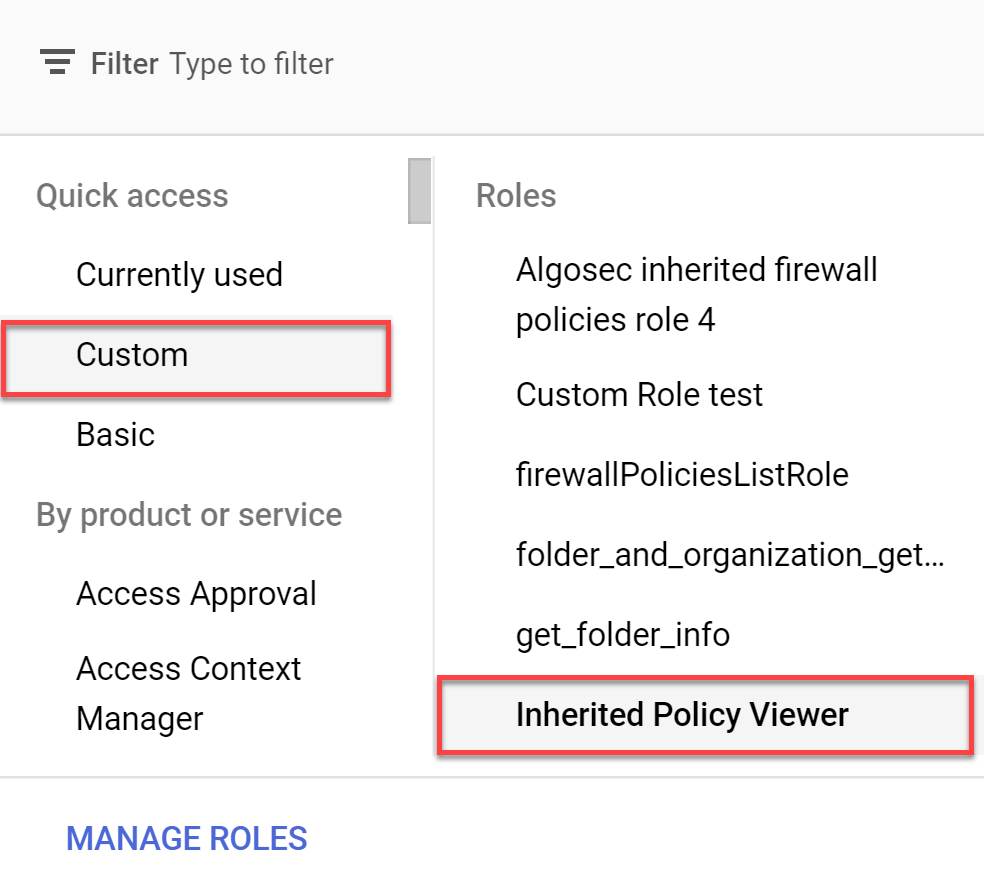
Click Select a role and choose Custom from the Quick access.
-
In the Roles list on the right side of the dialog window, click on the inherited role name you created in Step 5d.

-
Click SAVE. The policy is updated.
-
-
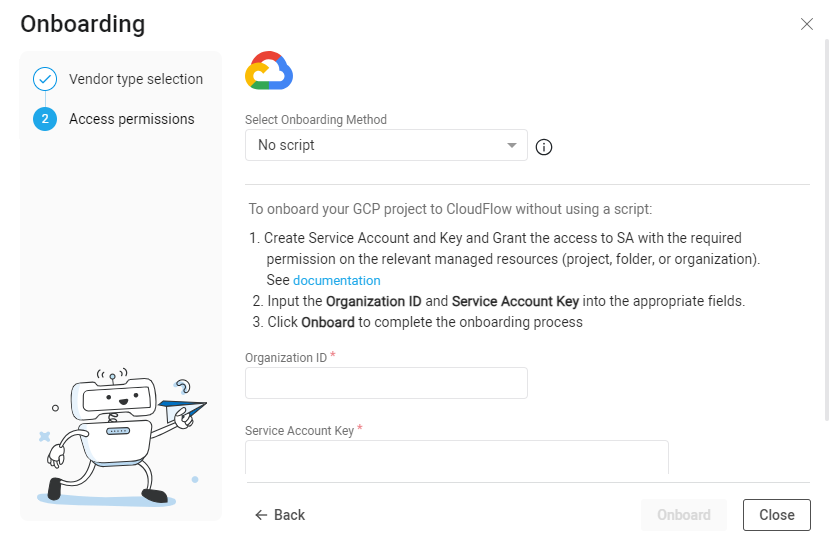
From the CloudFlow GPS Onboarding wizard, from the Select Onboarding Method, select No script.
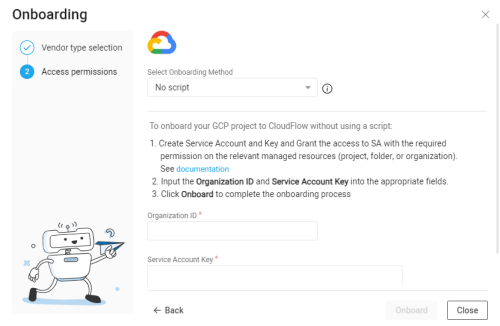
-
Input the Organization ID and Service Account Key into the appropriate fields. (The Service Account Key is stored in the JSON file that was downloaded in Step 4c.)
-
Click Onboard to complete the onboarding process.
To Onboard Google Cloud resources | API (single account)
You can use API calls to add a single Google Cloud project to CloudFlow.
Note: Any changes to a project after onboarding are not synced with CloudFlow. To delete one or more manually added accounts, see Delete manually configured subscriptions
Do the following:
-
Go to the page Add a cloud account.
-
Click on the tab For Google Cloud Project.

The instructions for onboarding a Google Cloud Project using API appears.
-
Follow the instructions on the page.
To Onboard Google Cloud resources | Terraform
You can leverage Terraform, the infrastructure-as-code solution, as another option for onboarding your Google Cloud projects into CloudFlow.
Do the following:
Integrate the code below into your Terraform toolkit. Make the following parameter value replacements in the Locals section:
Parameter Description Notes cf_auth_url
URL to authorize CloudFlow
-
For US use:
https://app.algosec.com/api/algosaas/auth/v1/access-keys/login
-
For EMEA use:
https://api.platform.eu.app.algosec.com/api/algosaas/auth/v1/access-keys/login
-
For ANZ use:
https://api.platform.anz.app.algosec.com/api/algosaas/auth/v1/access-keys/login
cf_url
URL to onboard Google Cloud Project
-
For US use:
https://api.cloudflow.us.app.algosec.com/cloudflow/api/admin/v1/onboarding/gcp
-
For EMEA use:
https://api.cloudflow.eu.app.algosec.com/cloudflow/api/admin/v1/onboarding/gcp
-
For ANZ use:
https://api.cloudflow.anz.app.algosec.com/cloudflow/api/admin/v1/onboarding/gcp
tenantId
Your CloudFlow Tenant ID
clientId
Client ID
This is part of Access Key details. In CloudFlow, go to Access Management > API ACCESS tab. Create a new API Access Key or use an existing one. See here. clientSecret
Client Secret of the API Access Key
This is part of Access Key details. In CloudFlow, go to Access Management > API ACCESS tab. Create a new API Access Key or use an existing one. See here. organization_id
Organization ID
project_id
Project ID
sa_id
Service Account ID
Copylocals {
cf_auth_url = "XXXXXXXXXXXXXXXX"
cf_url = "XXXXXXXXXXXXXXXX"
tenantId = "XXXXXXXXXXXXXXXX"
clientId = "XXXXXXXXXXXXXXXXX"
clientSecret = "XXXXXXXXXXX"
organization_id = "XXXXXXXXXXXXX"
project_id = "XXXXXXXXXXX"
sa_id = "XXXXXXXXXXX"
}
resource "google_service_account_key" "cf-key" {
service_account_id = "projects/${local.project_id}/serviceAccounts/${local.sa_id}"
}
data "http" "cf_auth" {
url = local.cf_auth_url
method = "POST"
# Optional request headers
request_headers = {
Accept = "application/json"
}
request_body = jsonencode({ tenantId : local.cf_tenant, clientId : local.cf_client_id, clientSecret : local.cf_secret })
lifecycle {
postcondition {
condition = contains([200, 201, 204], self.status_code)
error_message = "Authorization failed"
}
}
}
locals {
auth_response = jsondecode(data.http.cf_auth.response_body)
auth_token = local.auth_response.access_token
}
data "http" "cf_onboard_account" {
url = local.cf_url
method = "POST"
# Optional request headers
request_headers = {
Accept = "application/json"
Authorization = "Bearer ${local.auth_token}"
}
request_body = jsonencode({
data : google_service_account_key.cf-key.private_key,
organization_id: local.organization_id,
project_id: local.project_id
})
lifecycle {
postcondition {
condition = contains([200, 201, 204], self.status_code)
error_message = "Onboarding process failed"
}
}
} -


Permissions required for Google Cloud
Note: When using the "No script" onboarding method, the following APIs must be enabled on the Project level before adding the Google Cloud permissions listed in the table below. For details, see Step 2 in To Onboard Google Cloud resources | No script.
| # |
Required API Service* *Click for link to Google Cloud Docs |
Permission grant level |
|---|---|---|
| 1 | compute.googleapis.com |
Project |
| 2 | iam.googleapis.com |
Project |
| 3 | storage.googleapis.com |
Project |
| 4 | cloudresourcemanager.googleapis.com |
Project |
| 5 | logging.googleapis.com |
Project |
Important: Missing permissions can cause CloudFlow to malfunction and lead to data inconsistencies. AlgoSec is not responsible for any issues arising from missing permissions.
|
# |
Required Permission* *Click for link to Google Cloud Docs |
Permission grant level |
|---|---|---|
| Access level: READ | ||
| 1 | iam.serviceAccountViewer |
Project |
| 2 | serviceusage.serviceUsageAdmin |
Project |
| 3 | compute.viewer |
Project |
| 4 | logging.views.access |
Project |
| 5 | iam.serviceAccounts.list |
Project |
| 6 | storage.buckets.list |
Project |
| 7 | compute.networks.list |
Project |
| 8 | compute.firewalls.list |
Project |
| 9 | compute.instances.list |
Project |
| 10 | compute.subnetworks.list |
Project |
| 11 | resourcemanager.projects.get |
Project |
|
The following are mandatory ONLY if Organizations or Folders are onboarded: |
||
| 12 | compute.firewallPolicies.list |
Organization or folder |
| 13 | resourcemanager.folders.get |
Organization or folder |
| 14 | resourcemanager.organizations.get |
Organization |
Enable Google Cloud logs
By enabling Google Cloud logs, CloudFlow can retrieve and analyze logs. This provides data, shown on the Risks page and Network Policy page, such as the date each rule was last used.
Do the following:
-
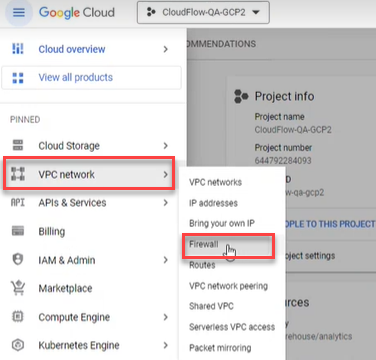
In the Google Cloud console, select VPC network > Firewall.

-
Click the firewall selector at the top of the page.

The Select From dialog appears.

-
Select the firewall whose rules you want to log.
-
Select the rules.
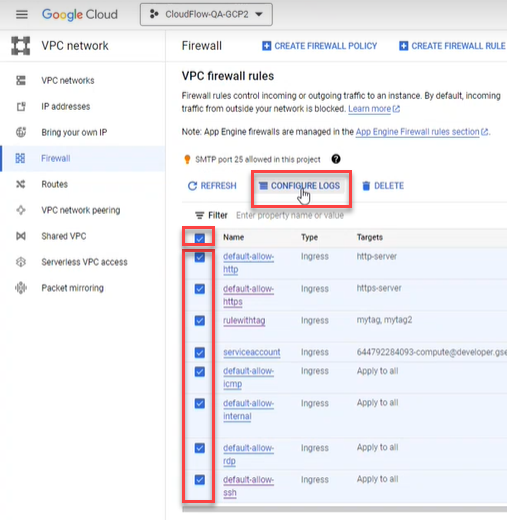
Enable Google Cloud logs for rules in a local firewall policy
-
Use the checkbox to the left of the rule name to select individual rules. To select all rules in the project, click the checkbox in the header. Then click CONFIGURE LOGS.
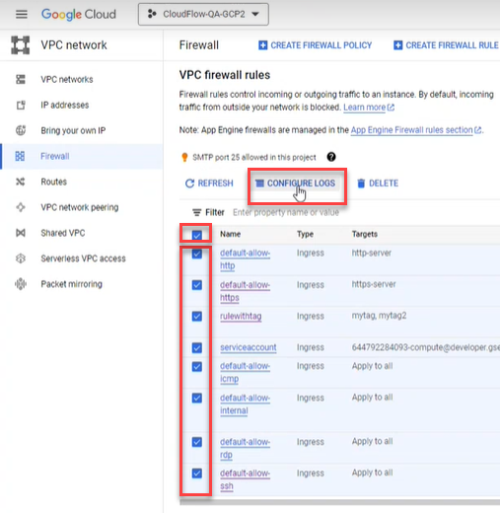
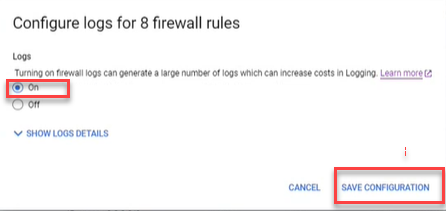
-
In the popup that appears, select On. Then click SAVE CONFIGURATION.

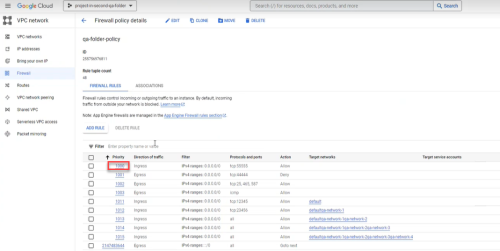
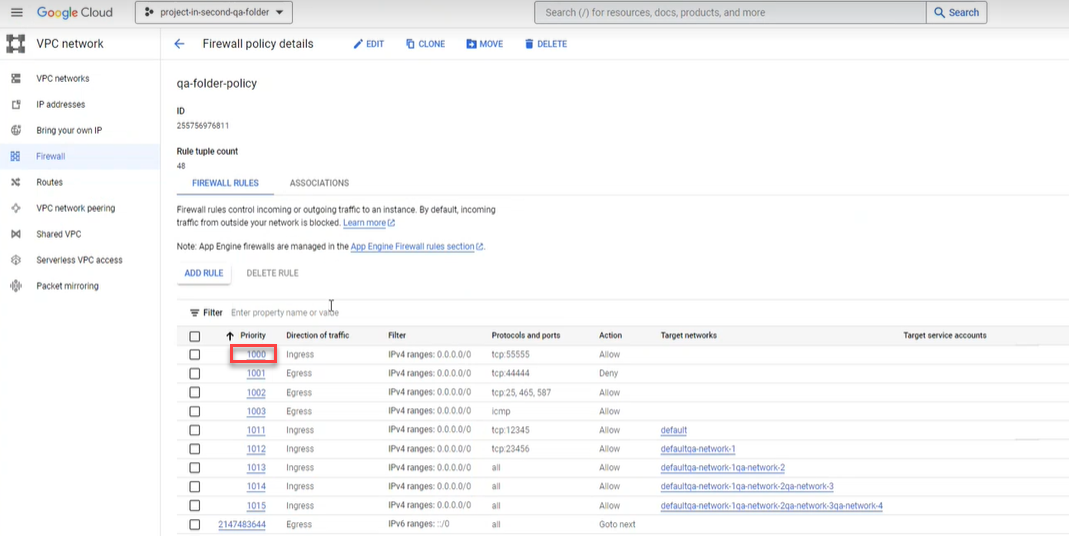
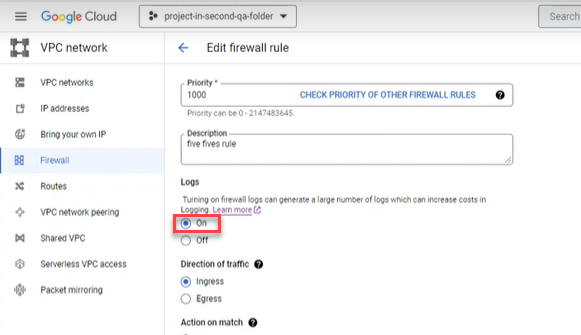
Enable Google Cloud logs for rules in an inherited policy
Note: Traffic logs for rules in inherited policies are only collected for projects that have been onboarded to CloudFlow.
Note: Each rule in an inherited policy must be edited separately.
-
Click the Priority number of the rule
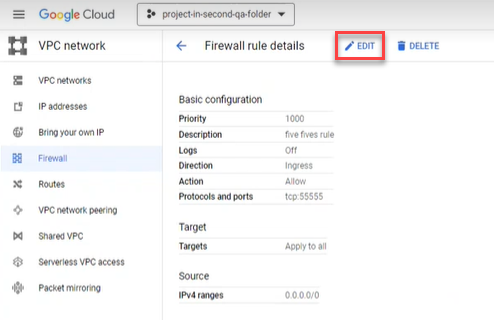
-
Click EDIT.
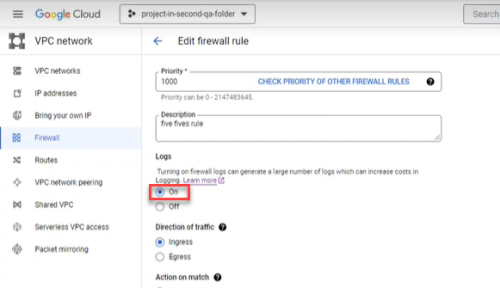
-
Under Logs, select On. Scroll to the bottom and click SAVE.
-


Offboard Google Cloud projects from CloudFlow
Offboarding automated Google Cloud projects from CloudFlow is done via the Google Cloud Console.
Do the following:
-
Navigate to the Google Cloud Console and select IAM from the navigation menu.
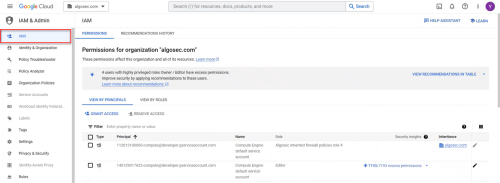
-
Select the project / folder / organization you want to offboard.
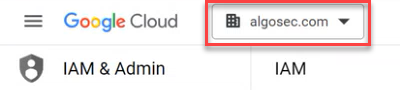
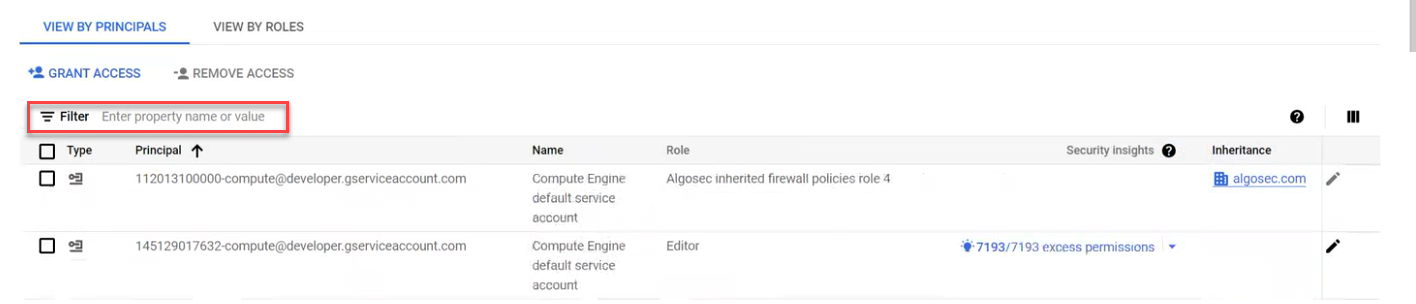
-
Use the Filter to search for the access project.

-
Select the access project you want to remove and then click Remove Access.
A confirmation window appears.
-
Click CONFIRM.
The access project and associated project(s) is removed.


Note: Removed projects will automatically sync with CloudFlow once every hour.