AWS account management
This topic describes the process of onboarding AWS accounts to CloudFlow.
For list of required permissions see Permissions required for AWS roles.
You can choose from the following three onboarding methods to add new AWS accounts:
-
With script - Uses scripts to onboard AWS resources. Changes to accounts after onboarding are automatically synced from AWS to CloudFlow.
-
API (single account) - Onboard a single account. Changes to the account after onboarding are not synced.
-
Terraform - Leverage Terraform, the infrastructure-as-code solution, to onboard your AWS accounts into CloudFlow. Changes to accounts after onboarding are automatically synced from AWS to CloudFlow.
Note: Any changes in an onboarded accounts will automatically sync with CloudFlow once every hour.
Access the Onboarding wizard
Do the following:
-
In the CloudFlow
 Settings area, click
  ONBOARDING.
On the Onboarding Managment page that opens, click +Onboard.
-
If you are onboarding your first account, click the New Cloud Account button on the welcome page.
-
Otherwise, click the
 button and click Next.
The AWS Onboarding wizard appears.

-
Select your preferred method to onboard using the Select Onboarding Method dropdown.
*Automatically syncs changes to accounts from AWS to CloudFlow after onboarding. Onboarding Method Description Automatic sync* With script Uses scripts to onboard AWS resources Yes API (single account) Onboard a single subscription via API No Terraform Onboard AWS resources using Terraform Yes -
Onboard AWS accounts using your preferred method:
 To onboard AWS resources | With script
During the onboarding process, CloudFlow connects with your AWS StackSets and any subsequent changes made to StackSets in AWS such as addition or removal of Stacks (accounts) are automatically reflected in CloudFlow.
Do the following:
-
In the Onboarding wizard for AWS , from the Select Onboarding Method dropdown, select With script to select the onboarding method using scripts.
The Generate CloudFormation template for account(s) onboarding page appears.
-
Specify the permissions for the role in AWS (these will be embedded in a downloadable CloudFormation template file).
Permissions settings Description Role permissions For more information, see Permissions required for AWS roles
Retrieve VPC Flow Logs Select to retrieve VPC Flow Logs (flow logs must enabled in AWS for them to be visible in CF). For more information, see VPC Flow Logs Use the same external ID for all accounts Select to use the same external ID for all accounts -
Click Download Template. The CloudFormation template file is downloaded to your machine.
-
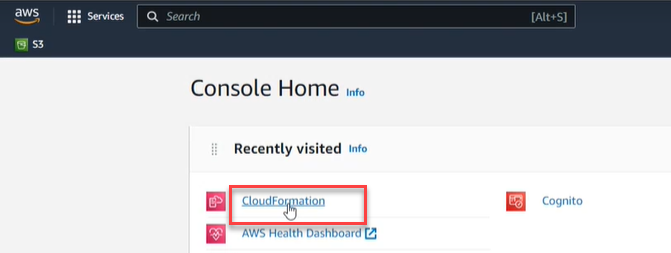
Log in to the AWS Console Home.
-
In the AWS Console Home, click CloudFormation.

-
Create single or multiple accounts to sync with CloudFlow.
To onboard a single account
-
Click Stacks.

-
Click Create Stack and select With new resources (standard).
-
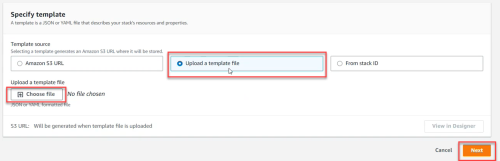
In the Specify Template section, click Upload a Template File. Click Choose file. Browse and select the CloudFormation Template that you downloaded previously. Then click Next.
-
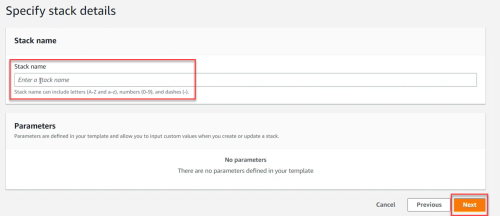
In the Specify Stack details section, give the Stack a name and then click Next.
Note: The account name displayed in CloudFlow is initially the AWS account number (ID) of the user who created the Stack (account) in AWS. To edit the account name in CloudFlow, see Edit account details.
-
On the Configure Stack options screen, click Next.

-
Review the Stack. Select I acknowledge that AWS CloudFormation might create IAM resources.

-
Click Submit. It may take several minutes for the Stack to be created and the account to appear in CloudFlow.
To onboard multiple accounts
-
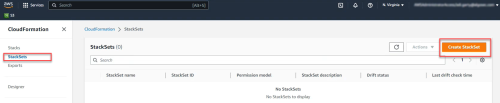
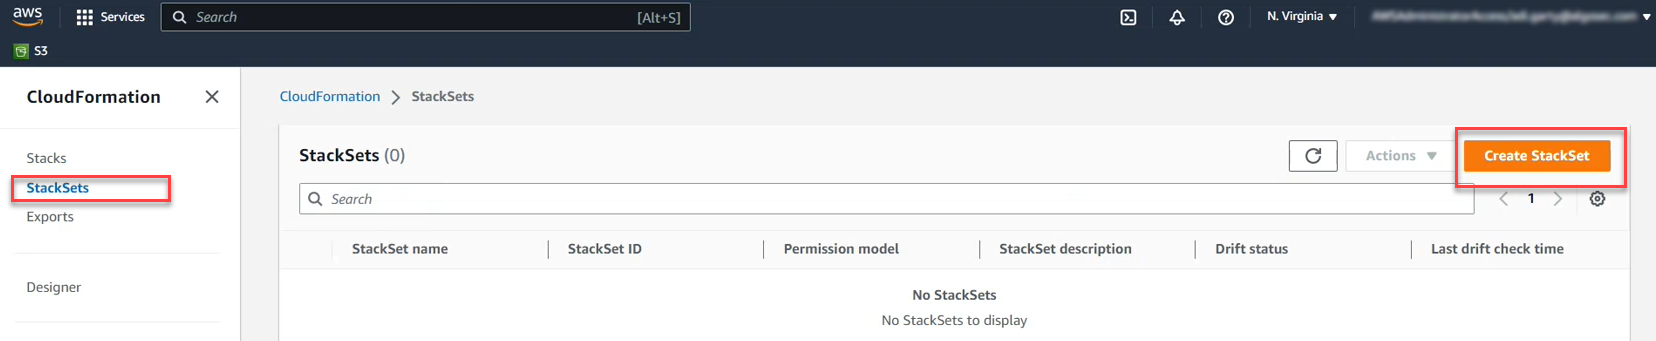
Click StackSets.
-
Click Create StackSet.
-
In the Specify Template section, click Upload a Template File. Click Choose file. Browse and select the CloudFormation Template that you downloaded previously. Then click Next.
-
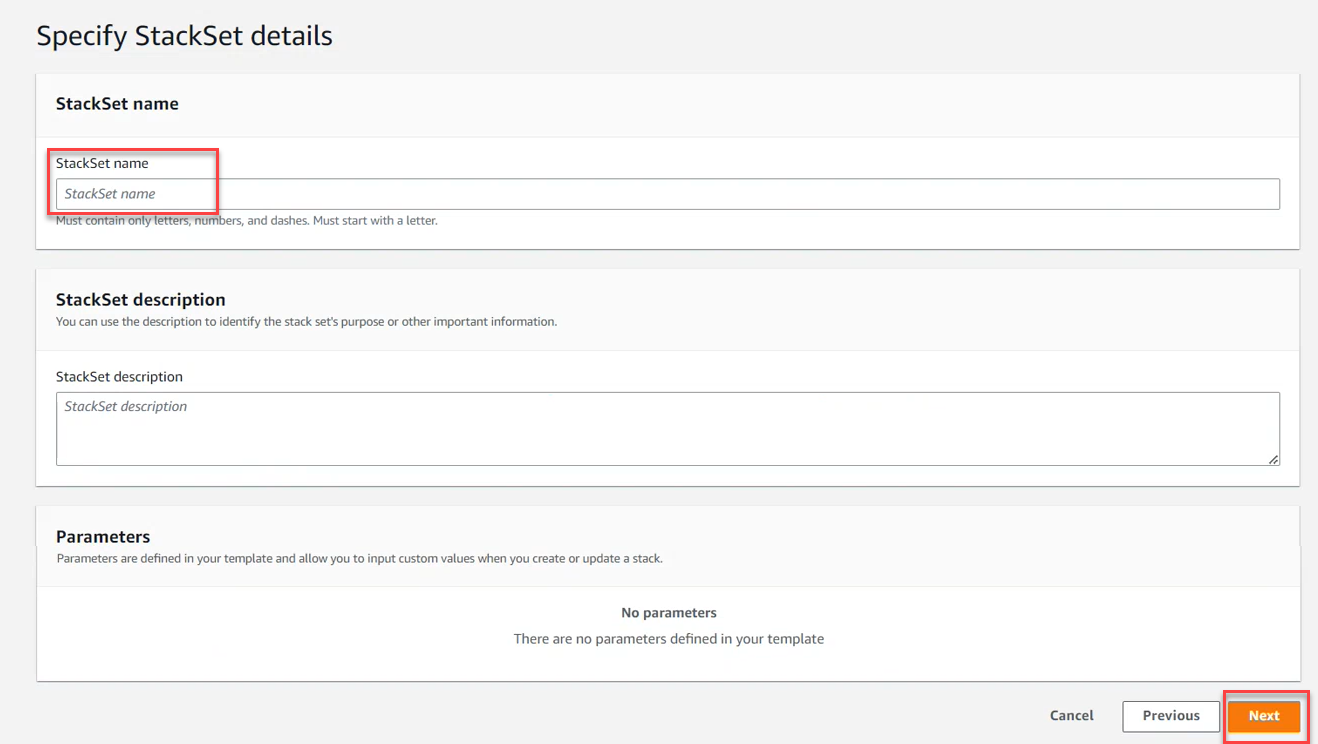
In the Specify StackSet details section, give the StackSet a name and then click Next.

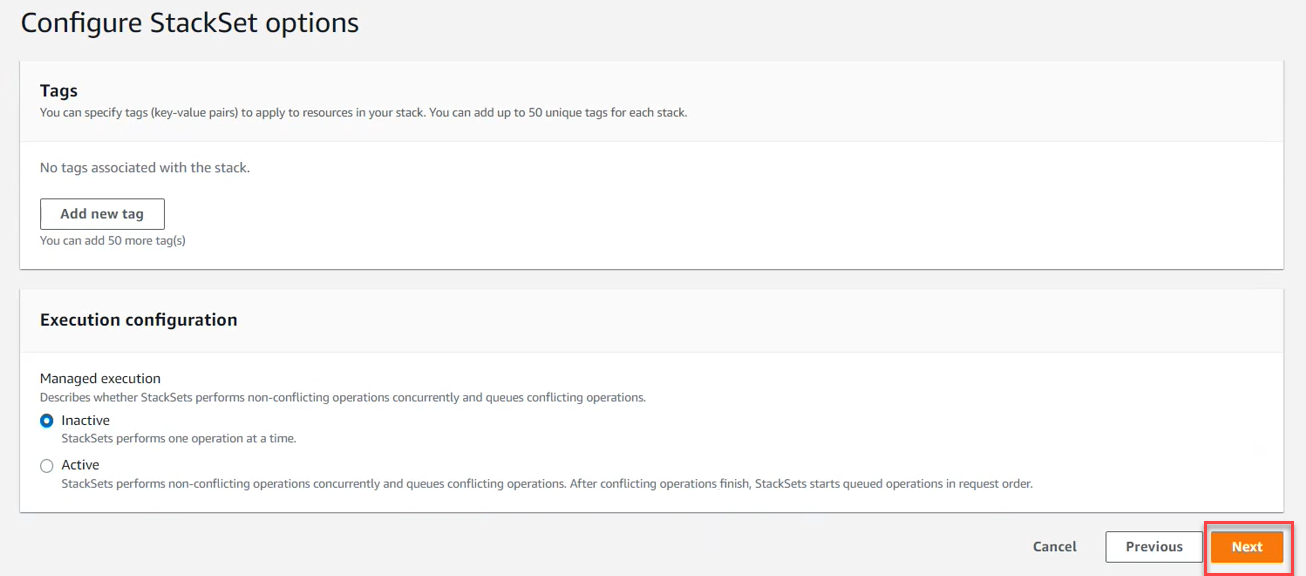
The Configure StackSet options screen appears.
-
On the Configure StackSet options screen, click Next.

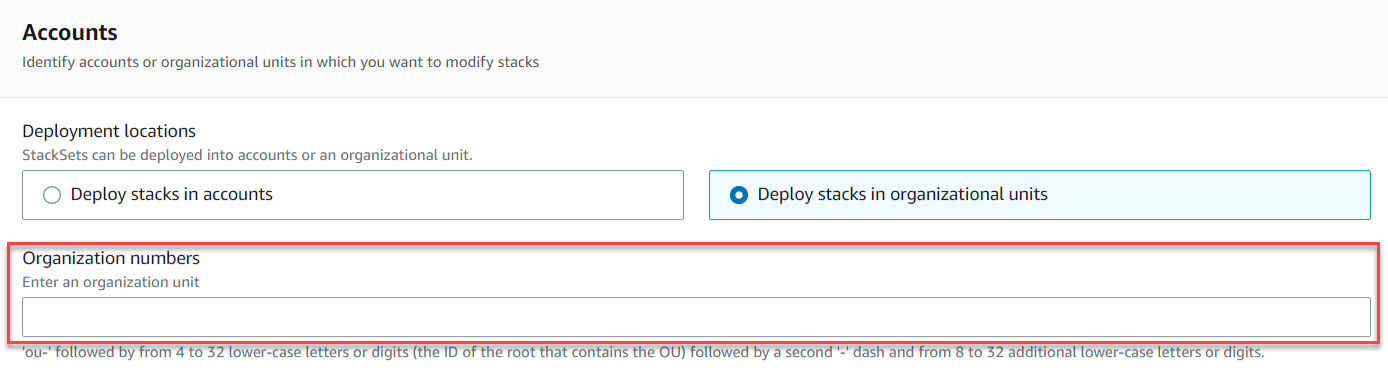
The Deployment locations section appears.
-
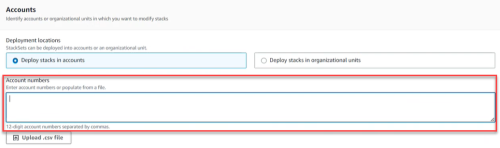
In the Deployment locations section, either:
-
Select Deploy stacks in account (and enter the account numbers)
-
Deploy stacks in organizational units (OUs) (and enter the OU IDs)
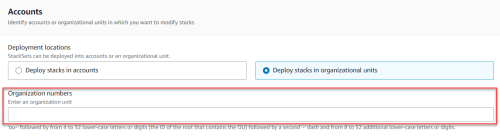
Note: The account names displayed in CloudFlow are initially set to the the AWS account numbers (ID). To edit the account names in CloudFlow, see Edit account details.
-
-
In the Specify regions section, select the region(s) where the stack will be created and managed.

-
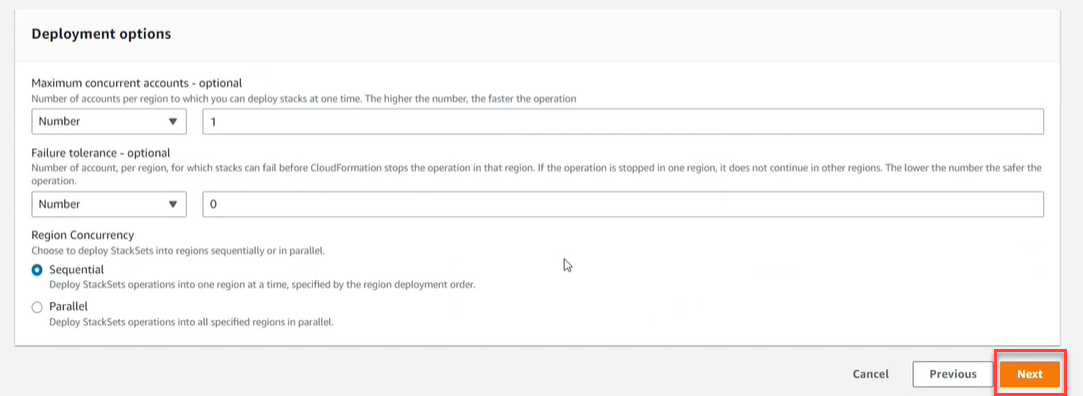
Set Deployment Options based on the needs and requirements of your system. Then click Next.

-
Review the StackSet. Select I acknowledge that AWS CloudFormation might create IAM resources.
-
Click Submit. It may take several minutes for the StackSets to be created and the accounts to appear in CloudFlow.
Tip: You can check the individual stack instances in CloudFormation>StackSets as follows.
-
Click the created StackSet.
-
Click the Stack Instance tab and see which accounts were created and their detailed status.
-
-
Note: For issues onboarding AWS accounts, see Troubleshoot AWS onboarding.
To onboard AWS resources | API (single account)
You can use API calls to add a single AWS account to CloudFlow.
Note: Any changes to an account after onboarding are not synced with CloudFlow. To delete one or more manually added accounts, see Delete manually configured subscriptions
Do the following:
-
Go to the page Add a cloud account.
-
Click on the tab For an AWS account.

The instructions for onboarding an AWS account using API appears.
-
Follow the instructions on the page.
To onboard AWS resources | Terraform
You can leverage Terraform, the infrastructure-as-code solution, as another option for onboarding your AWS subscriptions into CloudFlow.
Do the following:
Integrate the code below into your Terraform toolkit. Make the following parameter value replacements in the Locals section:
Parameter Description Notes cf_auth_url
URL to authorize CloudFlow
-
For US use:
https://app.algosec.com/api/algosaas/auth/v1/access-keys/login
-
For EMEA use:
https://api.platform.eu.app.algosec.com/api/algosaas/auth/v1/access-keys/login
-
For ANZ use:
https://api.platform.anz.app.algosec.com/api/algosaas/auth/v1/access-keys/login
cf_url
URL to onboard AWS
-
For US use:
https://api.cloudflow.us.app.algosec.com/cloudflow/api/admin/v1/onboarding/aws
-
For EMEA use:
https://api.cloudflow.eu.app.algosec.com/cloudflow/api/admin/v1/onboarding/aws
-
For ANZ use:
https://api.cloudflow.anz.app.algosec.com/cloudflow/api/admin/v1/onboarding/aws
tenantId
Your CloudFlow Tenant ID
clientId
Client ID
This is part of Access Key details. In CloudFlow, go to Access Management > API ACCESS tab. Create a new API Access Key or use an existing one. See here. clientSecret
Client Secret of the API Access Key
This is part of Access Key details. In CloudFlow, go to Access Management > API ACCESS tab. Create a new API Access Key or use an existing one. See here. Copylocals {
cf_auth_url = "XXXXXXXXXXXXXXXX"
cf_url = "XXXXXXXXXXXXXXXX"
tenantId = "XXXXXXXXXXXXXXXX"
clientId = "XXXXXXXXXXXXXXXXX"
clientSecret = "XXXXXXXXXXX"
}
data "http" "cf_auth" {
url = local.cf_auth_url
method = "POST"
# Optional request headers
request_headers = {
Accept = "application/json"
}
request_body = jsonencode({ tenantId : local.cf_tenant, clientId : local.cf_client_id, clientSecret : local.cf_secret })
lifecycle {
postcondition {
condition = contains([200, 201, 204], self.status_code)
error_message = "Authorization failed"
}
}
}
locals {
auth_response = jsondecode(data.http.cf_auth.response_body)
auth_token = local.auth_response.access_token
}
data "http" "cf_onboard_account" {
url = local.cf_url
method = "POST"
# Optional request headers
request_headers = {
Accept = "application/json"
Authorization = "Bearer ${local.auth_token}"
}
request_body = jsonencode({
cf_role : "arn:aws:iam::XXXXXXXX:role/XXXX-CREATED_ROLE-XXX",
external_id : "algosec-2XXXXXX6-9XXa-4XX5-876b-9XXXXXXXXXX0",
# event : { RequestType : "Create" }
event : { RequestType : "Delete" }
})
lifecycle {
postcondition {
condition = contains([200, 201, 204], self.status_code)
error_message = "Authorization failed"
}
}
}
######################################################################
# Print the created data to console
output "onboard_status" {
value = data.http.cf_onboard_account.status_code
} -


Permissions required for AWS roles
The following permissions are required for CloudFlow for the selected role and are included in the downloaded CloudFormation Template.
Important: Missing permissions can cause CloudFlow to malfunction and lead to data inconsistencies. AlgoSec is not responsible for any issues arising from missing permissions.
|
# |
Required IAM permissions |
|---|---|
|
|
*Click for link to Amazon API Docs |
| Access level: READ | |
|
1 |
ec2:DescribeRegions |
|
2 |
ec2:DescribeInstances |
|
3 |
ec2:DescribeVpcs |
|
4 |
ec2:DescribeSubnets |
|
5 |
ec2:DescribeNetworkInterfaces |
|
6 |
ec2:DescribeSecurityGroups |
|
7 |
ec2:DescribeInternetGateways |
|
8 |
ec2:DescribeVpnGateways |
|
9 |
ec2:DescribeVpnConnections |
|
10 |
ec2:DescribeVpcPeeringConnections |
|
11 |
ec2:DescribeRouteTables |
|
12 |
ec2:DescribeTransitGateways |
|
13 |
ec2:DescribeTransitGatewayAttachments |
|
14 |
ec2:DescribeTransitGatewayRouteTables |
|
15 |
directconnect:DescribeDirectConnect* |
|
16 |
ec2:SearchTransitGatewayRoutes |
|
17 |
ec2:DescribeNetworkAcls |
|
18 |
elasticloadbalancing:DescribeLoadBalancers |
|
19 |
ec2:DescribeFlowLogs |
|
20 |
s3:List* |
|
21 |
s3:GetObject* |
|
22 |
s3:GetBucketLocation |
|
23 |
logs:GetLogEvents |
|
Optional IAM permissions |
|
| Access level: WRITE Note: Access level WRITE is needed if you want to change policy details. |
|
|
24 |
ec2:AuthorizeSecurityGroupIngress |
|
25 |
ec2:AuthorizeSecurityGroupEgress |
|
26 |
ec2:RevokeSecurityGroupEgress |
|
27 |
ec2:RevokeSecurityGroupIngress |
VPC Flow Logs
Tip: For background about VPC Flow Logs, see these: AWS Article: VPC Flow Logs, AWS Blog: VPC Flow Logs.
By enabling VPC flow logs, CloudFlow can retrieve and analyze flow logs. This provides you with data, shown on the CloudFlow Risk Trigger and Network Policy pages, about the date when SG rules were last used. On the network policy pages, you can use this data to clean out old or unused rules from your policies.
For more details on the benefits of enabling VPC flow logging, see Last used and Clean up policies
Once flow logs are enabled, CloudFlow will start displaying details about the last used date for each triggered rule. Follow the steps in Enable VPC flow logging to get started.
Notes:
(1) Allow up to 24 hours for relevant rule usage information to be displayed when enabling flow logs for the first time and when adding accounts that already had flow logs enabled.
(2) VPC flow logs can be stored on either S3 or CloudWatch.CloudFlow supports collecting flow logs from either option.
(3)CloudFlow supports processing flow logs only when they are stored in the default log format. More details in this AWS article.
(4) If you configure both S3 and CloudWatch as your VPC Flow Logs targets,CloudFlow will collect only from the S3 buckets.
(5)CloudFlow collects only VPC Flow Logs of traffic type “accept”. Make sure that you configure the VPC Flow Logs traffic type to either “Accepted traffic” or “All traffic” (more details in this AWS article)
Enable VPC flow logging
CloudFlow can work with flow logging enabled at the various levels that AWS allows: VPC, Subnet, Network Interfaces.
To provide optimal performance, the following procedure explains how to enable flow logging at the Network Interface level. Repeat it for each Network Interface requiring flow logging.
Note: For shared VPCs: Enable Flow Logs for Network Interface (ENI) participant accounts (VPC participants can only enable VPC Flow Logs on ENIs they own).
These instructions rely on the creation of an S3 (Simple Storage Service) bucket and configuring VPC Flow Logs to store on it. If you want to create cross account flow logs provide additional permissions to your S3 bucket, as explained below.
Do the following:
-
Enter your AWS account and open the AWS Management Console.
- In the Storage Section, click on S3.
- Click the Create Bucket button.
- In the dialog that is displayed:
- Enter a DNS compliant name for the S3 Bucket.
- Verify that the correct region is selected.
- Click Next.
Continue clicking Next until you see the Create Bucket button at the bottom right of your screen.
Note: By clicking Next until now, you have skipped parameters that do not require changes. The S3 Buckets page you just created is displayed.
-
(Optional) To create cross account flow logs, provide additional permissions to your S3 bucket, see AWS documentation.
- Click on your S3 Bucket name.
On the right, a panel displays the properties of this S3 bucket, permissions and management details. At the top is the Copy Bucket ARN button. -
Click the Copy Bucket ARN button.
The ARN (Amazon Resource Name) is now in your copy buffer. You will use it soon.
Important: Be sure not to copy anything else into your copy buffer until you are asked to paste this into a field in one of the last steps of this procedure.
- From the main AWS page, in the Compute section, click EC2.
- On the EC2 dashboard that is displayed, in the left panel Network and Security section, click on Network Interfaces.
A list of Network Interfaces is displayed. - Select a network interface on which you wish to enable flow logging.
- Under the network interface list, click the Flow Logs tab.
- Click the Create flow log button.
- In the Create flow log page that is displayed:
- Select Accept from the Filter dropdown list to indicate that only Accepted Traffic should be collected.
- For the Maximum aggregation interval select 10 minutes.
- For Destination, select Send to S3 Bucket.
- In the ARN field, paste the ARN that you copied in Step #7, above. It should still be in your copy buffer.
- Click Create at the bottom of the page.
- Optional: View your new flow log:
- Go to the Network Interfaces list
- Select the Network Interface for which you created the Flow Log.
- Click Flow Logs tab under the Network Interface List.
- In the Destination Tabs column, click the name of your S3 Bucket.
-
Configure this role trust relationship:
{ "Version": "2012-10-17", "Statement": [ { "Sid": "", "Effect": "Allow", "Principal": { "Service": "vpc-flow-logs.amazonaws.com" }, "Action": "sts:AssumeRole" } ] } -
Configure the following role permissions:
{
										"Version": "2012-10-17",
										"Statement": [
										{
										"Sid": "",
										"Effect": "Allow",
										"Principal": {
										"Service": "vpc-flow-logs.amazonaws.com"
										},
										"Action": "sts:AssumeRole"
										}
										]
									}
Note: For info about required permissions see Permissions required for AWS roles.
You must configure both of the elements below to store VPC Flow Logs in CloudWatch. See this AWS article for more details.
Modify the following parameters as needed:
| Parameter | Description |
|
TRAFFIC_LOG_FREQUENCY_PERIOD_MINUTES |
Determines the frequency, in minutes, at which CloudFlow collects traffic logs from AWS SGs. Value: Integer Default: 60 |
| ENABLE_TRAFFIC_LOGS |
Determines whether traffic log collection is enabled for AWS SGs. Disabling this parameter will cause CloudFlow to display Flow logs disabled in the Last used column on the risk trigger details pages, even when flow logging is enabled in the AWS SG itself. Value: Boolean Default: Enabled |
| INACTIVE_RULE_PERIOD |
Determines the number of days counting back from current day for which CloudFlow checks flow logs for unused rules. Range = 1 to 365 days Default = 30 If flow logs were enabled, available and collected byCloudFlow for the entire period, SG Rules that did not have a single hit during the period are by definition unused rules. In the Last used column, unused rules are marked as No traffic logged. For details, see Last used. Note: This parameter can also be configured in the Network Policies web interface, when selecting the “Unused rules” cleanup view. |
To modify any of these parameters, contact AlgoSec support.